
"To celebrate that the Fresh Moments dies that I designed for Sizzix are arriving to the shops around, I thought I would a project using one of the sets, the Hexagons (658609) ! I like very structural cards and die cutting is a perfect way to achieve that."

"Comecei por cortar duas vezes o Hexagono maior, usando dois papéis contrastantes. Estou a usar aqui um conjunto de papéis da my Mind's Eye, da colecção Indie chic. Adoro papel texturado e este tem uma grossura ideal para fazer um cartão."
"I start by die cutting two large - the largest Hexagon die - using two contrasting papers. I am using here a range of papers from the My Minds Eye Indie Chick collection. I love that is textured and has a nice thickness, thick enough to make the blank card."
"Depois peguei naquele que escolhi para a frente do cartão e coloquei um hexágono mais pequeno no centro e segurei-o com post-it ou fita-cola de baixa adesão. Passei-o pela Big shot e consegui a abertura no meio."
"Then I took the one for the front of the card and place a smaller die in the centre and secure with low tack tape, I run it through the Big Shot and I got the aperture in the centre."

"Para criar o cartão, usei o segundo maior hexágono e vinquei-o num canto, a cerca de 2 cm. isso irá criar uma dobra que aderi com PVA glue ao Hexágono com a abertura. Esta é uma maneira fácil de criar a base para um cartão, utilizando framelits com papel mais grosso".
"To create the folded card, I took the second large Hexagon and scored one corner at about 2cm or a bout 1" . That creates a flap in which I added Tacky glue to and then added it to the Hexagon with the aperture on. This is a quick way to create the base card using framelits with thicker card."

"Corte uma variedade de hexágonos mais pequenos, usando diferentes papéis da colecção. Esta é a melhor forma de ter a certeza de que os padrões e cores vão funcionar bem uns com os outros. Coloquei depois o cartão base no tapete de corte e brinquei um pouco com as formas, sobrepondo os diferentes tamanhos transformando-os em pequenas molduras dispostas à mesma distância."
"Die cut a variety of smaller Hexagons using several papers with different patterns from the same Indie Chick collection. This is the best way to make sure all the colours and patterns work well together. Then I place the base card on the cutting mat and play around with the shapes, layering them as the shapes all frame into each other at the same distance."
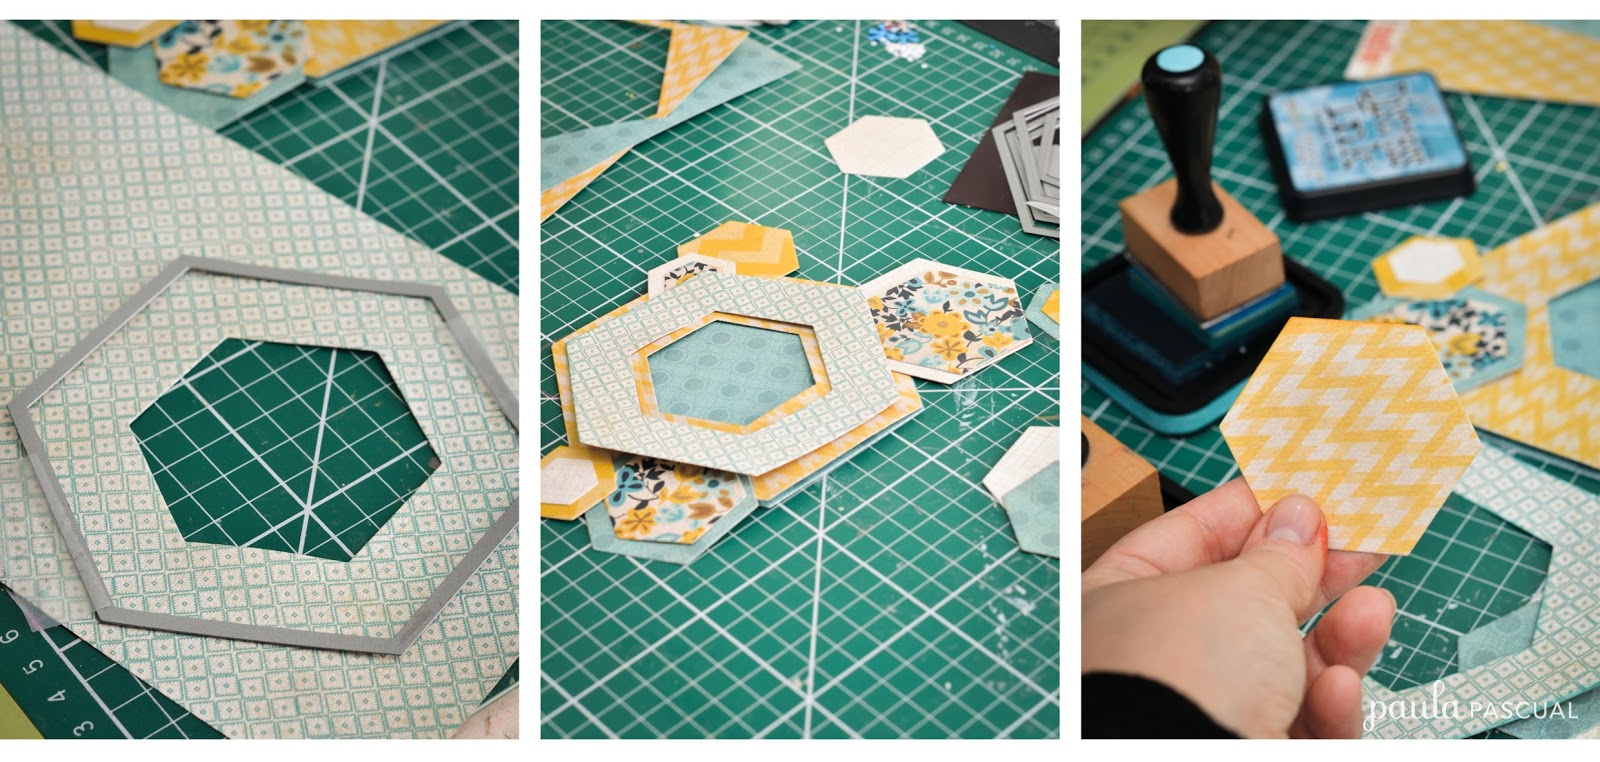
"Percebi depois que necessitava de algo mais para a frente, por isso cortei outra moldura usando o segundo maior hexágono e um outro grande para o centro, de modo a que o amarelo se visse de ambos os lados. Depois utilizei a distress ink da ranger em várias cores (broken china, wild honey e gathered twigs) para dar detalhe aos vários lados dos hexágonos. Colei-os usando ou almofadas 3D ou cola. Adicionei os botões, ataches e mensagem, todos da mesma colecção da My Mind's Eye."
"I realised that I needed something else over the front so I die cut another frame using the second largest Hexagon and a bigger one for the centre, that way the yellow showing through is the same in both sides. Then I used Ranger Distress inks - Broken China, Wild Honey and Gathered Twigs- to add details in all edges of the hexagons. I added all Hexagons using either foam pads or tacky glue. I added the buttons, brad (in the centre) and the message, all from the My Minds Eye Indie collection."


"E aqui está o cartão terminado! Espero que gostem e vemos-nos no próximo mês!"
"And here you have the finished card! I hope you like it and see you next month!"
Sem comentários:
Enviar um comentário